May 27, 2010

Mango Terrine

Labels: , , , , ,


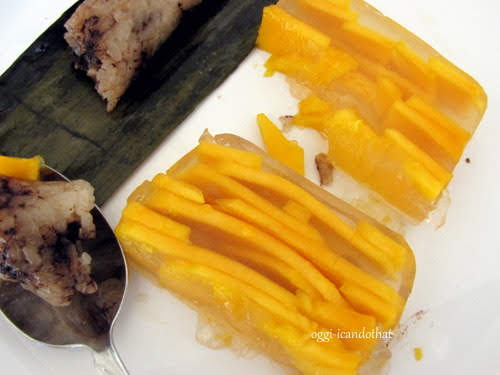
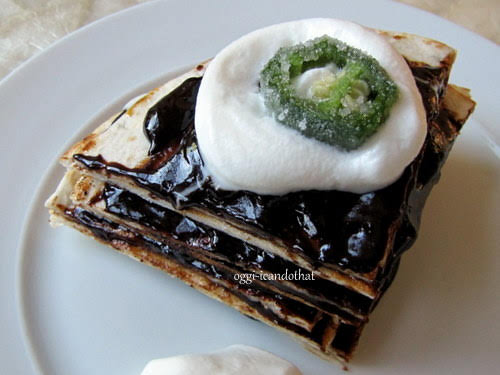
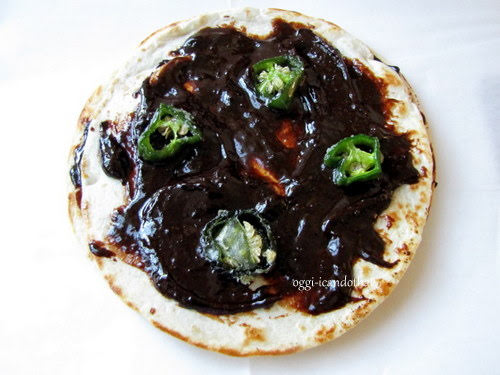
I usually buy a box of mangoes when they are in season and therefore cheap at $10.00 for 16 large ones. The only disadvantage is they ripen all at the same time. What to do aside from eating them with [ginger or chocolate] suman? Slice them thin, place them in a loaf pan, add lemon grass and mint tea agar (gelatin), let it set in the refrigerator, and voila! Mango terrine that's so refreshingly different and easy to prepare. The ginger-like lemon grass with a hint of cool mint is so delicious with mangoes. Yum!

Mango Terrine
4 mangoes, thinly sliced and chilled
1 sprig mint, reserve a few leaves for garnish
3 stalks lemon grass. trimmed and cut into 1 inch pieces
4 cups water
¾ cup sugar, or to taste
3 teaspoons agar powder
  • Line a medium loaf pan with plastic wrap leaving a 3 inch overhang on both long sides. Or lightly grease the bottom of the pan. Place a few mint leaves on the bottom if desired.
  • Bring water and lemon grass to a boil and simmer, covered, for 10 minutes. Add sugar and simmer until sugar is dissolved. Strain and transfer into a bowl. Sprinkle the agar and stir until completely dissolved. Snip the edges of the mint leaves, add to the gelatin mixture and leave for 10 minutes. Remove mint and discard.
  • Note: Omit the agar and leave the mint in the liquid, transfer into a tall bottle and chill in the refrigerator. It's a very refreshing and healthy iced tea drink, or if you love mixed drinks, add to vodka.
  • Arrange mango slices, slightly overlapping on the bottom of the loaf pan, pour the gelatin mixture to cover mangoes. Arrange another layer of mangoes and gelatin to fill almost to the top of the pan.
  • Cover with the plastic wrap overhang. Put in the refrigerator (or freezer if you are impatient like me) until completely cold and has set. Cut into slices.
I had 2 thin slices with chocolate suman. Delicious! Old [eating] habits are hard to break.;D


May 24, 2010

Barquillos

Labels: , , ,


There are several things [including cooking] that regular folks should leave to the professionals. Making barquillos (wafer rolls) is one of them. I don't know what I was thinking when I decided to make them. Oh, probably because I'm obsessed and nutty. Also because I have a small bottle of hazelnut extract and I wanted to try it in barquillos. I have to admit the hazelnut flavor is very yummy but making them although not too complicated takes forever. The wafers don't wait and have to be shaped as soon as they come out of the oven.

I divided one recipe into 4 and added ube, buco pandan, and mango flavorings and the hazelnut extract with a sprinkling of cocoa powder. I baked two at a time in my toaster oven that's why it took so long to finish. Spreading them really thin was also tedious although by the fourth wafer I got more adept and was able to finish each round of dough thinner and quicker too.

Well, at least now I know it's not worth making them and I'll just buy from the store. Not only are the barquillos made by Filipino bakers very thin, they are uniform in size and I can honestly say yummier than mine. And most important, they're not terribly expensive so why bother. Unless I want the barquillos flavored with say lychee or orange blossoms. Nooooo.;p


Barquillos
½ cup butter, room temperature
½ cup sugar
1 teaspoon pure vanilla extract or other flavoring
2 egg whites
2/3 cup all-purpose flour
  • Preheat oven to 375°F.
  • Draw 4-inch circles 2 inches apart on parchment paper, flip the paper and place on a cookie sheet.
  • In a standing mixer bowl with the paddle attachment, cream butter with sugar and vanilla until light and fluffy. Gradually beat in egg whites until smooth. Stir in the flour.
  • Drop 1½ teaspoons of the dough onto the baking sheet then spread thinly with a small offset spatula.
  • Bake one sheet pan at a time until wafers are brown along edges. Remove wafers from the baking sheet, one at a time, using a spatula or kitchen turner. Roll each wafer around the handle of a wooden spoon until edges overlap. Cool seam side down on a wire rack until crisp all over.

one recipe makes about 2 dozens 4-inch barquillos

May 21, 2010

Baked Corned Beef Spaghetti à la Noynoy

Labels: , , , ,

Baked Corned Beef Spaghetti a la Noynoy

For dinner tonight I had a weird pasta dish, baked spaghetti with corned beef, the recipe I got from the online edition of the Philippine newspaper Inquirer. I was checking the latest results of the presidential elections and naturally my eyes gravitated towards the Food section and found an article on the candidates's favorite recipes . Two of [the presumed president-elect] Noynoy Aquino's favorites are Libby's corned beef and his mom's Swedish meatballs. Reggie Aspiras, one of the newspaper's food columnists, wrote the article and created a recipe based on those favorites. The dish is baked spaghetti with Purefoods corned beef and for crunch and the must-have yellow color she added canned corn. I thought at first the flavor combination is odd but it actually works, it's quite delicious. Thank you Reggie for the recipe. The only thing I will alter should I make it again is to layer the spaghetti and sauce so there's sauce in the middle.

The future president might want to try this pasta dish, he'll probably like it.

Baked Corned Beef Spaghetti à la Noynoy
adapted from a recipe by Reggie Aspiras

1 pound thin spaghetti, cooked al dente and drained (reserve some of the water)
1/3 cup olive oil
3 tablespoons butter
1½ cups sliced onions
4 tablespoons chopped garlic
3 cups fresh tomatoes, peeled, seeded, and diced
3 cups shredded corned beef or 2 cans Purefoods corned beef
1 teaspoon Italian seasoning
1 can whole corn, drained
sea salt and ground black pepper to taste
cream cheese bechamel
1 cup each shredded mozzarella and Parmesan
  • Combine oil and butter. Saute onions until caramelized. Add garlic. Add tomatoes and Italian seasoning. Add corned beef, cook for five minutes. Add corn and pasta, toss to combine. If you find the mixture too dry, add a little bit of pasta water. Season to taste.
  • Transfer pasta to a baking dish. Top with cream cheese bechamel. Finish with grated mozzarella and grated parmesan. Bake in a pre-heated 350°F oven for 30 minutes or until cheese has melted and the top slightly golden.
Cream Cheese Bechamel
1/3 cup butter
1/3 cup flour
1 tablespoon chopped fresh parsley
3 cups fresh milk
1 cup heavy cream
1 cup cream cheese
1 teaspoon ground nutmeg
sea salt and ground white pepper to taste
  • In a saucepan, melt butter, whisk in flour. Slowly add milk, stirring frequently. Add cream and cream cheese and cook, stirring frequently until smooth and has thickened slightly. Remove from heat and add parsley, nutmeg, salt and pepper.
Baked Corned Beef Spaghetti a la Noynoy


The Filipino grocery store in my area does not sell Purefoods corned beef which is not a problem because I prefer to cook it myself anyway. There are seasoned corned beef in grocery stores, all you do is add water, boil, and shred. If you can't find seasoned corned beef, here again is the recipe.

Corned beef:

2 pounds beef brisket
2 tablespoons sea salt
1 tablespoon pickling spice
3 cloves garlic, chopped
1 onion, quartered
¾ teaspoon pink salt, optional (if you prefer the cooked meat with red hue)
water
  • Put brisket in a pot large enough to accommodate the brisket. Add the rest of the ingredients and enough water to cover meat. Bring to a boil, cover, turn heat down to medium, and boil for 2 hours. Remove cooked meat and transfer into a plate. Leave until cool enough to handle. Slice the brisket across the grain into 1½-inch strips. Shred the meat using 2 forks or with (gloved) hands.

May 19, 2010

Mellow Bakers: Miche, Pointe-à-Callière

Labels: , ,

Miche

Woohoo, I finished baking all 3 May 2010 MellowBakers breads with Miche, Pointe-à-Callière. I made a very small baby-size, 1 pound 10 ounces boule knowing I'm the only one who's going to eat it. Sour breads are not very popular around here. Besides, I didn't want to get disappointed if the bread turned out inedible.

It was a pleasant surprise when I cut open the bread to find it has a moist chewy open crumb as Jeffrey Hamelman promised. And it is also not too sour, at least to me it isn't, and has a smokey flavor that I really like. I hope the flavor gets even better just like Peter Reinhart's Miche recipe. I give Hamelman's recipe one point higher than PR's because of the beautiful open crumb.

Miche is a sourdough starter-raised bread that takes 2 days to make. A sourdough build is prepared 12 hours before and mixing, fermenting, shaping, second rising, and baking takes approximately 6 hours. This bread needs a baker's full attention as it has to be folded 3 times during fermentation.

I was not expecting too much from this bread as it was slooow in growth and super wet. I kept peeking while it was rising and didn't notice it getting any bigger and after 2 hours I poked it and it was ready. I was still suspicious and thought it wouldn't hold its shape when I inverted the basket on the peel [with a piece of parchment paper], but it did. And it had an oven rise of 1 inch and less than an inch all around. I'm very happy with the recipe, it's worth making again. Thank you Messrs. Hamelman and MacGuire.

Miche


MellowBakers
love to bake? then click on the logo and join us.

Mellow Bakers: Corn Bread

Labels: , ,

Corn Bread
Corn Bread

I love Jeffrey Hamelman's yeast Corn Bread, the second of 3 recipes I have baked for the MellowBakers May 2010 breads. The bread is slightly sweet and has a crunchy crust which is so good for elaborate sandwiches, or simply buttered, or spread with jam. I made a loaf with half a recipe using limed cornmeal and another half recipe with regular yellow cornmeal and the dough is formed into rolls. They are both yummy and I can't tell the difference in flavor.

This recipe is a 2-day bread requiring a 16-hour poolish. The next day the cornmeal is softened in water for 15 minutes before mixing with bread flour, water, olive oil, yeast, and salt. After fermenting, the dough is formed into whatever shape is desired, let rise, then baked in a steamy 460°F oven. In other words, it's a very simple recipe to do.

Corn Rolls
Corn Rolls
very nice with lemon curd

MellowBakers
Come bake with us!^__^

May 17, 2010

Crispy Pig Tails

Labels: , , , ,

Pig Tails

The love affair goes on. This time it's crispy breaded and baked pig tails. They are incredibly delicious to die for crunchy melt-in-your mouth tender pork delicacy. I love it simply dipped in vinegar-hot pepper-soy sauce dipping sauce.

One of our all-time favorite Filipino dishes is Ox Tail stew but I have never thought of cooking pig tails. After getting a small package of pig tails already sectioned into 6 inch lengths, I found a recipe from one of my cookbooks CHARCUTERIE AND FRENCH PORK COOKBOOK by Jane Grigson. The tails are brined for 3 days, are simmered with lots of vegetables then dredged in bread crumbs and grilled. I didn't use that recipe as I didn't want to wait 3 days but instead I adapted the one from gourmet.com which is from the Fergus Henderson's cookbook THE WHOLE BEAST that I read about here. [I want a copy of the cookbook, right now!]

Next time I cook these I'll take my time and brine the tails and cook them using Jane Grigson's method. And maybe deep fry them just like crispy pata (pork legs).

Pig Tails
they're good by themselves or with steamed mix of Israeli couscous, spinach and carrot orzo, baby garbanzos and red quinoa

Crispy Pig Tails

adapted from gourmet.com
2 pounds pig tails, cut into lengths
1 medium onion, coarsely chopped
1 carrot, coarsely chopped
1 rib celery, chopped
6 cloves peeled garlic
2 sprigs Italian parsley
2 sprigs thyme
zest of half a lemon (removed into strips using a vegetable peeler)
1 bay leaf
4 whole black peppercorn
1 cup red wine
2 cups chicken broth
1 teaspoons sea salt
1 tablespoon dry mustard
2 large eggs, lightly beaten
1 teaspoon sea salt
1 cup all-purpose flour
1 cup fine dry bread crumbs
3 tablespoons butter, cut into pieces

  • Preheat oven to 350°F.
  • Arrange tails in a large roasting pan, then add onion, carrot, celery, garlic, herb sprigs, zest, bay leaf, peppercorns, 1 teaspoon salt, wine, and broth and cover tightly with heavy-duty foil. Braise in oven for about 3 hours. Cool in cooking liquid, uncovered, to room temperature, about 2 hours, then chill, covered loosely, until tails are cold and firm, about 3 hours.
  • Put a heavy shallow baking pan on middle rack of oven and preheat oven to 450ºF.
  • Remove tails from braising mixture and remove adhering vegetables and aspic. Sprinkle tails with 1 teaspoon salt.
  • Whisk together mustard and eggs in a wide shallow dish and put flour and bread crumbs each in a separate wide shallow dish. Working with 1 piece at a time, dredge tails in flour, knocking off excess, then coat with egg, brushing it into the crevices and letting excess drip off, and roll tails in bread crumbs, coating thoroughly. Transfer as coated to a plate.
  • Remove hot baking pan from oven and add butter to pan, tilting it to coat. When foam subsides, add tails. Using tongs, turn and coat tails with butter on all sides. Roast until underside is browned, 10 to 15 minutes. Turn tails over and roast until other side is browned, 10 to 15 minutes more.

May 14, 2010

Chicken Wings With Chestnuts

Labels: , ,


This post is for Joelen's Culinary Adventures Wine & Dine Event: Japanese

I seldom make Japanese food because I prefer to eat it at restaurants. Sometimes, maybe once a year I make pressed sushi, onigiri, or beef robatayaki. For this event I wanted to cook something different other than sushi or teriyaki and found a chicken stew recipe in my Japanese cookbook. I had all the ingredients except for dried shiitake which I replaced with dried wild mushrooms. The stew is delicious, a little bit sweet and has a variety of flavors and textures.

Chicken Wings With Chestnuts
1½ pounds chicken wings, jointed (or 1 pound cubed boneless chicken)
1 tablespoon light olive oil
1 cup tiny baby carrots or sliced carrots
6 dried shiitake or ½ cup mixed wild mushrooms
20 chestnuts, peeled, skinned, and parboiled
2 pieces small taro, peeled, cubed, and parboiled
1 cup dashi stock
¼ cup sake
3 tablespoons sugar
2 tablespoons soy sauce
1 cup edamame in pods
water
salt
  • Rinse the mushrooms and soak in 1 cup boiling water for 20 minutes, remove mushrooms. Let cool slightly then cut into bite size pieces. Pour the mushroom liquid through a small coffee filter, set aside.
  • In a large skillet, heat the oil and stir fry the chicken wings until light brown. Add the carrots and mushrooms and stir fry for 1 minute. Add the dashi stock, mushroom liquid, taro, and chestnuts and let come to a boil. Cover pan, lower heat, and simmer for 5 minutes. Add sake, sugar, and soy sauce and let simmer uncovered until sauce has reduced and is slightly thickened. Taste and adjust seasoning.
  • While stew is cooking, boil the edamame in salted water for 5 minutes. Let cool slightly, then shell.
  • Transfer the stew into a large serving bowl. Sprinkle top with edamame. Best eaten while hot with steamed Japanese rice.


May 11, 2010

Lychee Babycakes with Rosewater Buttercream Frosting

Labels: ,


I wanted to make lychee macarons but couldn't find lychee powder. I will have to order it online when I find it. I'm sure someone is selling it. Nowadays there's nothing that you can't buy online if you search long enough. I didn't want to wait for either freeze dried or powdered lychee so I baked lychee babycakes and topped them with buttercream frosting flavored with rosewater essence. The flavors are a perfect match. The cake is buttery soft and not too sweet but there's too little lychee for the amount of flour. I should have used 2 cans. Well, next time.

Lychee Babycakes

1 14-ounce can lychees, drained (reserve the liquid)
2 cups all-purpose flour
1½ teaspoons baking powder
¼ teaspoon salt
¾ cup unsalted butter, room temperature
¾ cup sugar
2 eggs
2 teaspoons vanilla extract
  • Preheat oven to 350°F. Line 24 brownie (square) cups with paper liners (or line an 8 x 8-inch squaree pan with parchment paper).
  • Chop the lychees, set aside. Sift the flour, baking powder, and salt into a bowl and set aside.
  • In a stand mixer, cream the butter and sugar together on medium speed for several minutes until light and fluffy. Add the eggs, one at a time, and then the vanilla. Mix to combine. Add in slowly about 4 to 6 tablespoons of the reserved lychee liquid. Mix between additions to fully incorporate before adding more.
  • Toss the lychee pieces in the flour mixture to coat (this will help keep them from sinking to the bottom of the batter). Add flour and lychee mixture to the batter and mix to combine.
  • Scoop batter into prepared pans. Bake for 20 minutes for cupcakes and 35 to 40 minutes for square pan until a tester inserted in the center comes out clean. Cool on wire rack before frosting.
Rosewater Buttercream Frosting
adapted from MORE FROM MAGNOLIA
3 tablespoons all-purpose flour
1 cup milk
1 cup unsalted butter, softened
1 cup sugar
1 or 2 teaspoons rosewater
  • In a medium saucepan, whisk the flour into the milk until smooth. Place over medium heat and, stirring constantly, cook until the mixture becomes very thick and begins to bubble, 10 - 15 minutes. Cover with waxed paper placed directly on the surface and cool to room temperature, about 30 minutes.
  • In a large bowl, on medium high speed of an electric mixer, beat the butter for 3 minutes, until smooth and creamy. Gradually add the sugar, beating continuously for 3 minutes until fluffy. Add the rosewater and a drop of red food dye and beat well. Add the cooled milk mixture and continue to beat on medium high speed for 5 minutes until very smooth. Cover and refrigerate for no less and no longer than 15 minutes. Use immediately.

birdienumnum: moist, soft, and buttery babycake

Mellow Bakers: Grissini

Labels: , , ,

Grissini

The Italian bread sticks Grissini is one of the MellowBakers breads for May 2010. The bread sticks are very easy to make and the whole process takes less than 2 hours which goes: mix water, flour, olive oil, butter, salt, and yeast; let ferment for 1 hour; roll into a rectangle; cut into thin strips; bake without proofing for 20 minutes or until golden. The garlic studded dough didn't give me any problems other than the bread sticks got eaten very quickly. Easy come easy go.

I had these yummy sticks for lunch dipped in sour cream and gorgonzola and also for dinner with a pasta dish that has been a favorite of ours for more than 10 years, Farfalle with Asiago Cream Sauce.

Farfalle in Asiago Cream Sauce

8 ounces bow tie pasta
2 ounces pancetta or unsmoked bacon, diced
1 small red onion, thinly sliced
1 cup heavy cream
1 cup grated Asiago cheese
½ cup grated Parmesan cheese
salt and black pepper to taste
  • Boil the pasta in salted water for 11 minutes. In a large skillet, fry the pancetta until golden brown. Transfer into a plate and remove all but 1 tablespoon of rendered fat. Add the onion and stir fry until soft. Using a skimmer, transfer the pasta into the skillet and stir cook for a few minutes. Add the heavy cream and pancetta. Mix well, add salt and pepper to taste, then remove from heat. Stir in both cheeses. Serve immediately.
MellowBakers
Join us, we're mellow!

May 9, 2010

KULINARYA Puto

Labels: , , ,

Puto

The puto recipe in the KULINARYA guidebook is slightly different from the more popular recipes. It doesn't have coconut milk but has instead cooked rice added to the soaked rice. Using uncooked rice makes the recipe a bit involved with an added step of straining the blended mixture in a cheesecloth or fine sieve. The procedure uses greased plastic wrap to line muffin cups which is also time consuming.

The flavor of simple plain rice and sugar is very good and I really like it but I am not going to use raw rice and plastic wrap again. I prefer the easier to use rice flour and my puto molds lined with banana leaves.

Puto
adapted from from KULINARYA: A Guidebook to Philippine Cuisine
1 cup rice
1 cup water
1 tablespoon cooked rice
½ cup sugar
1 tablespoon baking powder
plastic wrap
oil for brushing plastic wrap
  • Wash rice and soak in water for at least 5 hours. Add the cooked rice. Put the rice in a blender. Add enough soaking water to reach the level of rice. Blend for 1½ minutes.
  • Pour the blended rice into a bowl and add the rest of the water, sugar, and baking powder. Mix until smooth. Using cheesecloth or a very fine sieve, strain the mixture into another bowl.
  • Brush the plastic wrap with oil, line each well of muffin pan or 1¾ inch puto molds. Trim the wrap so that each one fits snugly into each well or mold. Pour 2 tablespoon of the mixture into each well or mold. Steam on high heat for 15 minutes, undisturbed.
  • Remove muffin pan or molds from steamer and let cool. When cooled, pull up each puto using the plastic wrap, discard plastic. Serve with butter or grated coconut.
  • For puto pandan: Wash 6 pandan leaves, cut into 1 inch pieces, mix with the water, and blend. Strain and use the water to soak the rice. Add a drop of green food dye if desired.

May 7, 2010

Pork and Me: A Love Story

Labels: , , ,


My love affair with pork came late in my life. Growing up we didn't have much pork dishes because my parents specially my dad didn't like it. He didn't mind small portions of pork as a flavoring in vegetables, noodles, and in chicken pork adobo, and maybe once a year he was fine having grilled pork chops. I myself didn't cook pork very often and only have been cooking it more frequently since I started this blog 4 years ago. Better late than never in discovering its goodness, I guess.

I read in our local news here in Ashburn about a competition among chefs to prepare locally produced ingredients and this year pork is at center stage. The winner will be named King or Queen of Porc. Read more about the competition at their website: Cochon 555. I'd like to crown myself the princess of pork but I know there are many others who can out-pork me.^_^

Well, pork, how do I love thee, let me count the ways:

bagnet, lechon kawali, or pork belly confit
Pork Collage 3
Pork Collage1
Pork Collage 2


I made these bacon appetizers today. They are so porklicious specially the bacon candy.

Chestnuts Wrapped in Bacon

Chestnuts Wrapped in Bacon

a few rashers thin smoked bacon, cut into 3 pieces
whole roasted chestnuts (or water chestnuts)
  • Wrap the chestnuts in bacon pieces and place on a wire rack cut side down. Place the wire rack on a baking sheet lined with aluminum foil. Bake in a preheated 350°F oven until bacon is golden and cooked through.
Bacon Candy

Bacon Candy
Bacon Candy
crrrunch!

thin smoked bacon rashers, cut into 1 inch pieces
brown sugar
  • Dredge the bacon pieces in brown sugar. Place on a wire rack and put the wire rack on a baking sheet lined with aluminum foil. Bake in a preheated 350°F oven until caramelized and darkish brown (do not burn). They will become crisp as they cool.

May 4, 2010

Candied Jalapeños

Labels: , ,


I found a new victim to candy: jalapeños. These small moderately hot but flavorful chiles are perfect candied to fill dessert flour tortillas or to garnish cupcakes. The sweet and spicy candied morsels are rather addicting, specially paired with chocolate paste made with dried chiles and dark chocolate.


I brushed 6-inch flour tortillas with melted butter, sprinkled a little sugar, then cooked in a dry hot skillet until the edges are crisp. A tablespoon or two of the chocolate paste is spread on the tortilla then topped with a few slices of the candied jalapeños. I stacked about 4 or 5 more tortillas before cutting into 4 pieces. Each wedge is served with whipped heavy cream and garnished with a piece of candied jalapeño. Sweet...spicy...sweet...Yummy.


Candied Jalapeños


6 jalapeños
1 cup sugar
½ cup water
1 tablespoon light corn syrup
sugar for dredging, optional
  • Cut off both ends of chiles and cut into thick slices. In a small skillet or saucepan, heat 1/3 cup of the sugar and ¼ cup water. Let come to a boil, turn down heat, add the jalapeños and simmer for 5 minutes. Drain and transfer jalapeños on a plate, set aside to cool. Discard the syrup. Heat the rest of the sugar, the remaining water, and corn syrup. Let come to a boil, turn off heat, add the jalapenos and simmer for 2 minutes. Remove jalapeños and let cool. Repeat 2 more times or until the syrup has become really thick. Transfer the slices on a rack and let dry slightly. Roll on sugar if desired or leave overnight to dry completely.
Sweet Mole Sauce/Paste


2 chile ancho, washed and seeded
water
4 ounces panocha, piloncillo, or demerara
4 ounces dark chocolate, chopped
¼ teaspoon ground cloves
½ teaspoon ground cinnamon
Place the chiles in a small saucepan and add enough water to cover. Boil for 10 minutes or until chiles are very soft. Remove half of the water and reserve. Puree in a blender, return to the saucepan together with the sugar, cloves, and cinnamon. Simmer for 3 minutes or until of desired consistency, adding the reserved water if you want it saucier.

May 2, 2010

Dining with Sherlock Holmes

Labels: , ,

Sherry Syllabub

Sherlock Holmes's character in the movie with Robert Downey Jr. is IMHO so outrageously inaccurate I could only tolerate the first 15 or 20 minutes. I wouldn't mind the comic book idea of Sherlock but portraying him as an unwashed, unshaven, and prone to street brawl is too much for me. He's an expert boxer and swordsman but does not engage in fisticuffs; does not mumble incoherently with an unrecognizable accent; and he is meticulous as a cat in his grooming habits, clearly indicated in The Hound of the Baskervilles when he secretly stayed in a hut where he made sure his chin is always smooth and his clothing and linen are as clean as if he were in his own home in Baker Street. I guess the movie is not for someone like me and is catered to 12-year old boys and Transformers fans. The only amazing thing I found out about this movie is the director, Guy Richie made a great success in turning normally good actors into talentless amateurs.

Anyway, I watched one of the old Sherlock Holmes movies [which are not perfect either} and again borrowed from the library THE COMPLETE SHERLOCK HOLMES. While browsing through the library's long list I came across the cookbook Dining with Sherlock Holmes by Julia Rosenblatt. Most of the recipes are simple and easy to prepare and I imagine Holmes and Watson having the dishes at home or in some inn.

Marrow Toast
4 two-inch center sections of marrowbone
4 slices bread, toasted
a pinch of salt
ground black pepper
lemon juice, to taste
chopped chives for garnish
  • Push the marrow out of the bone and soak it in cold water for 20 minutes. Slice the marrow and place it on the slices of toast. Season with salt, ground pepper, and lemon juice. Put it under the broiler until the marrow has melted. Sprinkle with chives and serve hot. (I roasted the marrow and spread it on bread just like butter.)


marrow on toast

Sherry Syllabub
1 cup cold heavy cream
½ cup sherry
juice and zest of half a lemon
2 tablespoons sugar
  • Whip the cream until stiff. Fold in the rest of the ingredients. Chill before serving.

 
Design by New WP Themes | Bloggerized by Lasantha - Premiumbloggertemplates.com